In this article, I will show you how to configure your Rapberry Pi 3 into a routed WiFi access point. This configuration is a little bit more complicated than the configuration of my previous post that is available under the following link : https://gremaudpi.emf-informatique.ch/create-a-bridged-access-point-with-raspberry-pi-and-openwrt/
In this configuration, the WiFi clients are on a different subnet than the management workstation. The Raspi will act as a router and forward all packets from the clients to the Lan network using Masquerading (Port Address Translation)
Schema

Get the current OpenWrt image
UPDATE : At time of this writing (November 2019), most recent releases of OpenWRT have a known bug preventing the use of the WiFi interface.
The only solution I found to circumvent this problem is to install an old release of OpenWRT (version 18.06.1) that did not have this bug, and afterwards to upgrade to the latest version of OpenWrt directely from the console of OpenWrt.
So, start by downloading the latest release of OpenWRT that works with the WiFi interface
https://downloads.openwrt.org/

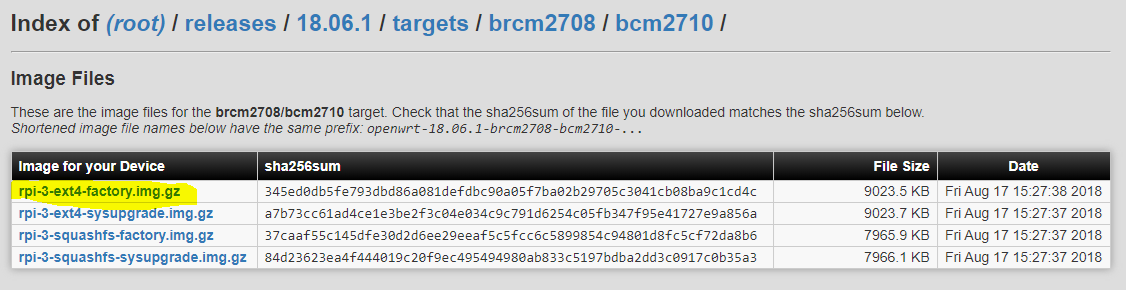
Take the current factory image (openwrt-18.06.1-brcm2708-bcm2710-rpi-3-ext4-factory.img.gz)
Burn the image with etcher
Change LAN IP address of Raspi
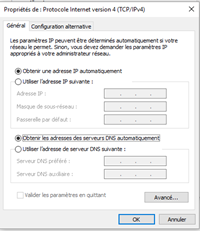
For this you will need to configure your management workstation IP address to 192.168.1.2 with subnet mask 255.255.255.0.

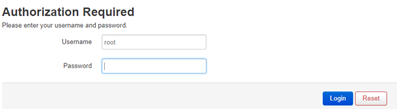
Then open a browser and access to the default IP of the Raspi (http://192.168.1.1)
ATTENTION : BE AWARE OF USING HTTP AND NOT HTTPS
By default, the password is empty.
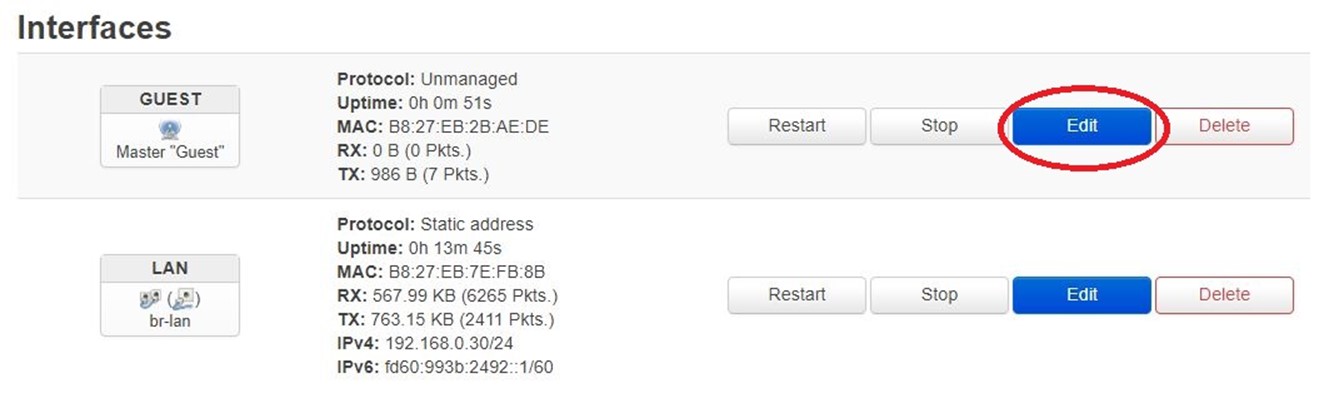
Then, navigate to Network – Interfaces and edit LAN interface

Disable DHCP server on this interface

To apply this configuration, you will need to first click on "Save & Apply" and then force apply with "Apply unchecked".

Your Raspi is now available under 192.168.0.30.
You can revert your management workstation Ip configuration to DHCP.
Begin by doing some cleanup
Open a browser and access to the new IP address of the Raspi (192.168.0.30)
Navigate to Network – Wireless and remove the default wireless SSID OpenWrt (see below)

Navigate to Network – Firewall, and under "General Settings" delete all Zones and click "Save and apply"

Under "Traffic Rules", check that all rules are gone
Create a new wireless SSID for Guest
Navigate to Network - Wireless and add a new SSID called "Guest" associated with a network called "Guest" too.


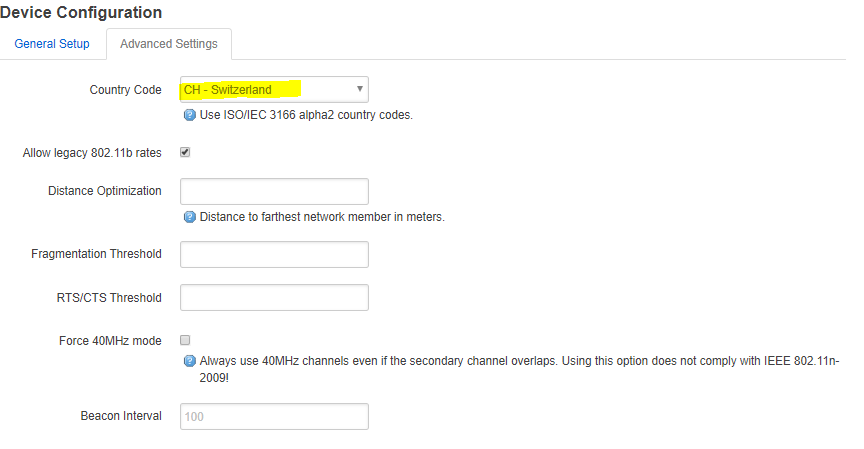
Do not forget to specify you Country Code (in my case Switzerland) in order for your device to comply with established international rules (Advanced settings)
Click "Save and Apply" and you should now have a brand new SSID (see below)

Click "Enable" to activate the new SSID

Set your Contry code
Configure the new Guest Interface
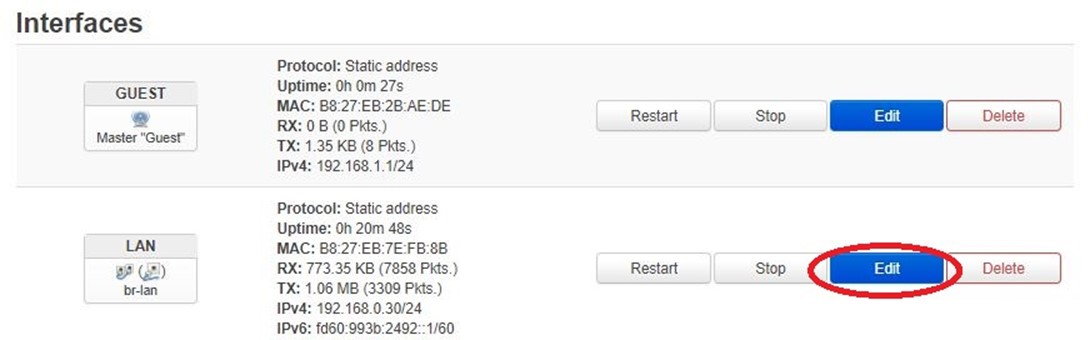
Navigate to Network – Interface and edit the newly created Guest Interface
Under General Setup, change the protocol from "Unmanaged" to "Static address"

Then click "Switch protocol" and configure the IP address and the netmask of the Guest Interface

Assign a DHCP server to this interface and click "Save and Apply"

Create firewall Zones for the interfaces
Navigate to Network – Interfaces and edit the LAN Interface
Under "Firewall Settings" create a new zone called LAN (notice that DHCP server should be disabled for the LAN interface)
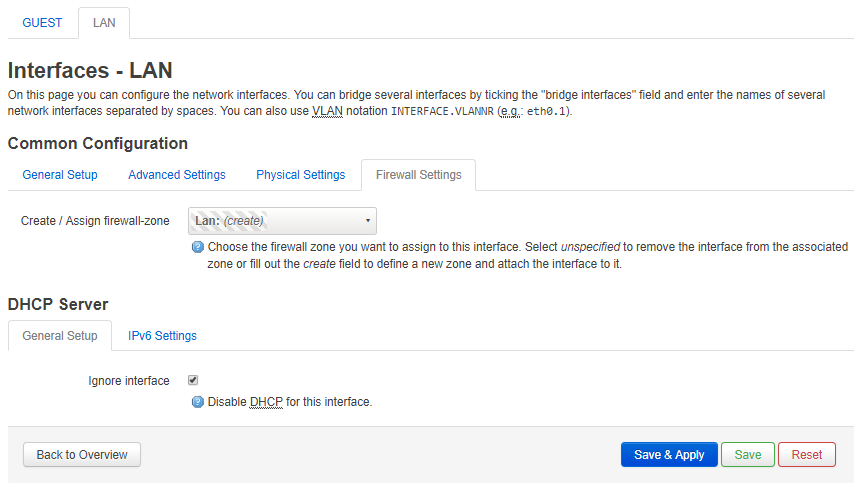
Click "Save and Apply"
Do the same for Interface Guest. Navigate to Network – Interfaces and edit the Guest Interface

Under "Firewall Settings" create a new zone called Guest (notice that DHCP server should be enabled for the GUEST interface)
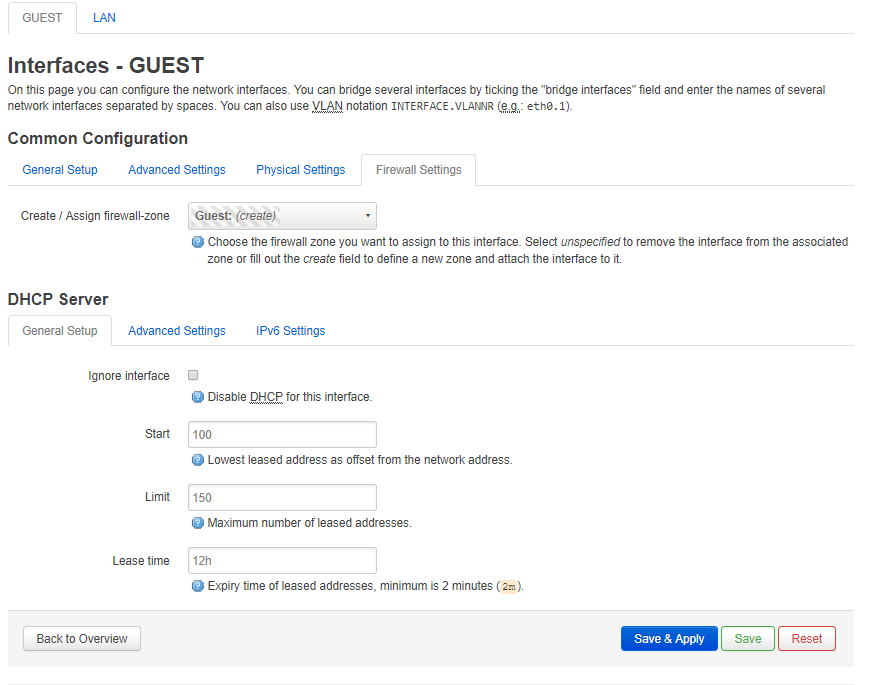
Click "Save and Apply"
Configure the firewall
Navigate to Network – Firewall, you should now see two zones
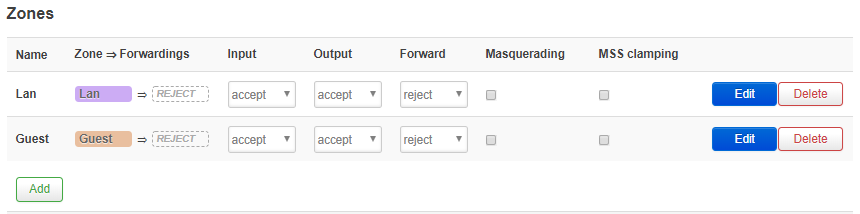
Edit the zone "Guest" and configure it as bellow:
- Name : guest
- Input : accept
- Output : accept
- Forward : accept
- Masquerading : unchecked
- MSS clamping : unchecked
- Covered Network : guest
- Allow forward to destination zones : lan
- Allow forward from source zones : empty
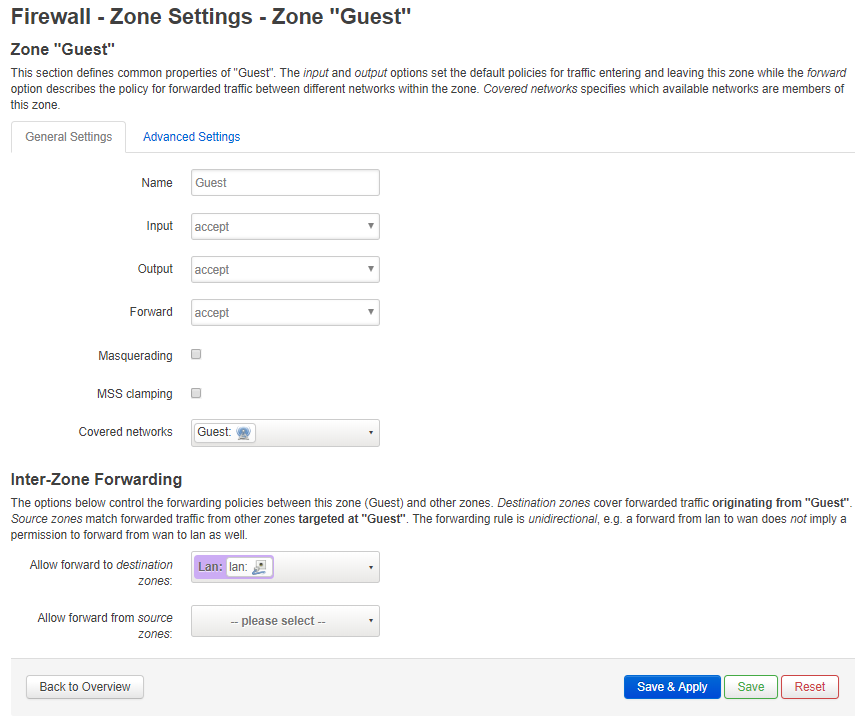
Click "Save and Apply"
Edit the zone "Lan" and configure it as bellow:
- Name : lan
- Input : accept
- Output : accept
- Forward : reject
- Masquerading : checked
- MSS clamping : checked
- Covered Network : lan
- Allow forward to destination zones : empty
- Allow forward from source zones : guest
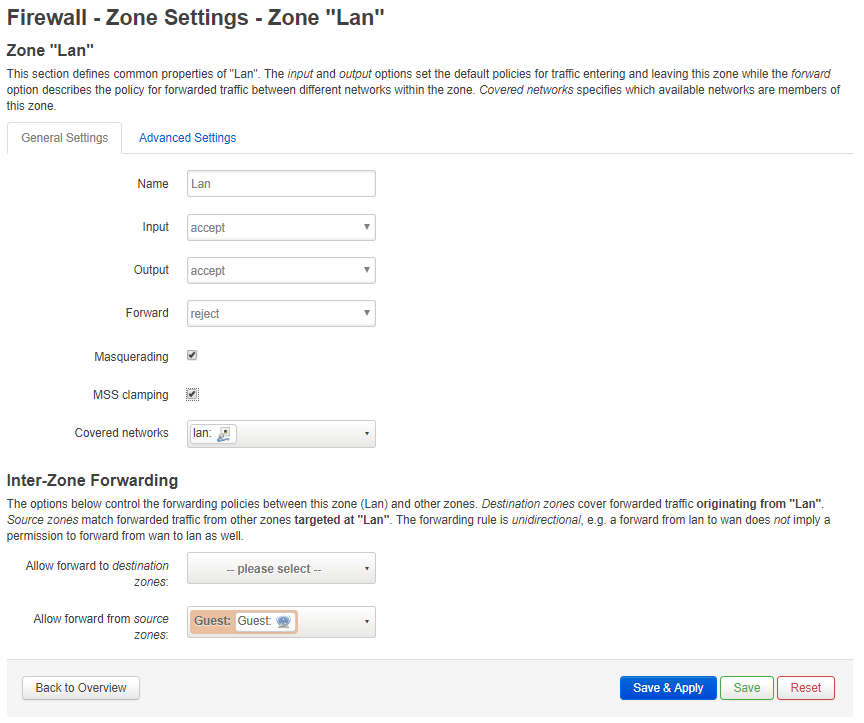
Click "Save and Apply"
The Firewall – Zones Settings should look like this

Click on "Save and Apply"
Navigate to Network - Wireless and enable the newly created SSID "Guest"
Then, check if it works by connecting a wireless device to the "Guest" SSID

UPDATE : now if you want to upgrade to the latest version of OpenWrt, you can get the latest sysupgrade image from OpenWrt doenload site

And perform the upgrade from OpenWrt console (System- Backup/Flash firmware)
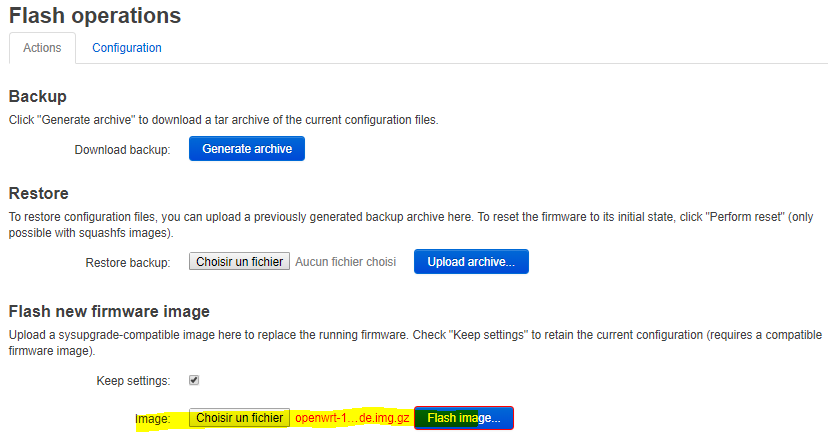

Verify that the lastest version was installed correctly (Status – Overview)

The new version should work like a charm…
That's all folks
Thank you very much! I was looking around for clear instructions to do exactly the same thing and you saved me hours of wasted time. Now all I need to do is figure out how to limit guest wifi users to just the internet and one local IP. Thanks again.
You are welcome ! No idea how to do this... Maybe add some rules in the firewall ...
Yeah, the devil is always in the details...
Thank you for this article!
When i 'm connecting to the ssid guest, i dont have access to internet. Did i miss something?
Thanks for this post, it was very helpful.
I used it to configure ROOter (an OpenWRT variant that supports Mobile Broadband dongles) on the Raspberry Pi.
I've now effectively got a Mobile Broadband Router that I can use on the road or as a backup Internet connection at home.
Thank you for this article. You saved me hours of time.
This is wonderful!
These are truly great ideas in on the topic of blogging. You have touched some good points
here. Any way keep up wrinting.
is the issue with the openwrt version still there? I am trying with a RPI 4B..